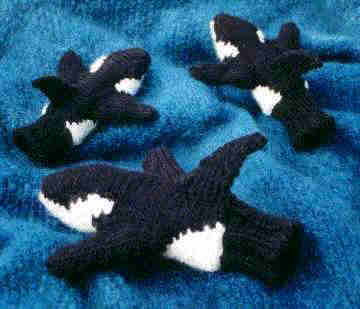
A-00100 Orca Mittens - Adult Size
Back to Orca Mittens main page
Although the Orca Mittens pattern only includes children's sizes, it can easily be modified to make mittens to fit a small adult hand.
Hand Measurements:
Finished Mitten Measurements:
Yarn: Remember that making the mittens larger will take more yarn than the original pattern calls for. You will be using a double strand of worsted weight yarn throughout the mitten. Note that the amounts below are only estimates, but they allow an extra 10% just in case!
Needles: The pattern calls for size 8 US (5 mm) needles for the largest child's size. Instead, use size 9 US (5.5 mm) or whatever size you need to get a gauge of 14 sts and 21 rows to 4" (10 cm).
Body: Make body exactly as given in instructions.
Dorsal Fin: Make exactly as in instructions.
Thumb Fins: Work thumb fins exactly as in instructions, except work even in stockinette until they are 3.5" (9 cm) long (or desired length). Then k2tog around, break off yarn and pull through remaining 6 sts. These thumbs measure about 2.5" in circumference. If you think they will be too tight, work the thumb as in the instructions until you begin working circularly. Then decrease only once or twice, rather than three times (you will have 13 or 15 sts rather than the 11 noted in the pattern). Remember that every 2 sts will add a little more than a half an inch to the circumference.
Cuff: Pick up 36 sts around wrist, which will be one stitch for 9 out of every 10 rows. This makes a cuff that is as wide as the body of the mitten. If you would like it tighter, pick up 32 or 28 sts. I recommend working in K2P2 ribbing for elasticity in this larger size. Work until the cuff is 2.5" (6.5 cm) long, or desired length, before binding off.
Adjusting the Length Between the Thumb and Fingertip
The instructions above create a mitten that measures 4" (10 cm) from the top of the thumb opening to the fingertip. If you need to lengthen the mitten in this area, you will need to revise the chart for the body, adding stitches between stitch 16 (where the thumb opening ends) and stitch 22 where the short rows for fingertip shaping begin. The gauge works out to be 3.5 stitches per inch, so add 2 sts for a half an inch, 3 or 4 sts for a full inch, 5 sts for 1.5", 7 sts for two inches, and so on.
The easiest way to modify the chart will be to make a copy of it, then cut it along one of the vertical lines between stitches at about st 18 or 19. Tape the two halves onto another sheet of paper, leaving space between them for the additional sts you want to add. The chart shows 6 sts per inch, so leave a half inch space for 3 sts, a full inch for 6 sts, and so on. After you've taped the chart into position, use a ruler to add vertical and horizontal lines for the stitches you are adding. Then, put Xs in the stitches that will be black areas of the whale and leave the white ones blank. Knit the body from your new chart, then do the fins and finishing as described above.
Questions or suggestions? Contact us
All text and images copyright © 2001, 2002 Margaret K.K. Radcliffe
About 7.5" (19 cm) around the palm (not including the thumb
6" (15.5 cm) from base of thumb to tip of index finger
8" (20.5 cm) circumference
2.5" (6.5 cm) cuff (this length can easily be adjusted)
8" (20.5 cm) from cuff to fingertip
3.5" (9 cm) from base of thump to tip (this length can easily be adjusted)
Yarn Required
White
Black
yards
86
244
(meters)
(94)
(267)
oz
1.7
4.9
(grams)
(50)
(140)
